使用快应用实现一个TodoList
快应用是一种新的应用形态,以往的手机端应用主要有两种方式:网页、原生应用;网页无需安装,却体验不是很好;原生应用体验流畅,却需要从应用商店下载安装,难以一步直达用户;快应用的出现,就是希望能够让用户无需下载安装,并且还能流畅的体验应用内容。
为了达到上面的目标,快应用建立一种新的语言开发规范,同时提供一系列的开发套件辅助支持。简单来说,开发者主要利用前端知识与技能,以及对应的 IDE,手机设备就可以做原型的开发。快应用使用前端技术栈开发,原生渲染,同时具备 H5 与原生应用的双重优点,开发者使用的前端技术栈资料多,学习成本低。
(本文的完整代码可以通过使用 IDE 新建项目,并选择 TodoList 项目作为模板之后查看。)
一、准备
我们需要使用快应用来实现一个 TodoList,所以首先我们需要学习如何使用快应用进行开发
-
安装 NodeJS
需安装8.0以上版本的 NodeJS (建议使用 10.0+ 以上),请从NodeJS 官网下载
-
安装快应用开发工具(IDE)
快应用开发工具(IDE)提供了开发快应用所需要的功能,无需再额外安装其他的工具和环境
二、新建项目
1.在 IDE 中点击【文件】【新建快应用工程】菜单,在打开的页面中输入项目名称、项目路径等项目相关信息,点击【完成】即可完成新建项目
2.此时预览界面会提示依赖未安装,点击安装依赖进行依赖安装,等到安装完毕再点击重新启动编译,即可在预览中运行项目。
3.如果想在手机上查看运行效果,需要将手机连上电脑并打开【开发者选项】【USB 调试】,此时会弹出是否信任该设备的弹窗,点击确认即可。然后,在点击 IDE 上的【USB 调试按钮】,会自动在手机上安装调试所需要的调试器和环境,之后,就可以在手机上运行项目了。
三、开始开发
1.项目使用 vuex 进行状态管理,所以首先我们需要安装 quickapp-vuex
npm install quickapp-vuex -S
之后我们就可以在项目中使用 vuex 了。首先我们在 src 目录下新建一个 store 目录,再在这个目录里面新建一个 store.js 文件:
import Vuex from "quickapp-vuex";
import storage from "../helper/storage.js";
import { KEYS } from "../helper/constant.js";
import { filters } from "../helper/utils";

export default new Vuex.Store({
  state: {
    todoList: [],
    tagList: [],
  },
  getters: {
    filteredList: (state) => (status) => {
      return filters[status](state.todoList);
    },
  },
  mutations: {
    setTodoList(state, list) {
      state.todoList = list;
    },
    setTagList(state, list) {
      state.tagList = list;
    },
    addNewTodo(state, item) {
      state.todoList.push(item);
    },
    addNewTag(state, item) {
      state.tagList.push(item);
    },
    updateTodo(state, item) {
      const idx = state.todoList.findIndex((el) => el.id === item.id);
      state.todoList.splice(idx, 1, item);
    },
    delTodo(state, item) {
      const idx = state.todoList.findIndex((el) => el.id === item.id);
      state.todoList.splice(idx, 1);
    },
  },
  actions: {
    async init({ commit }) {
      const todoList = (await storage.get(KEYS.STORAGE_KEY_QUICKAPP)) || [];
      const tagList = (await storage.get(KEYS.STORAGE_KEY_TAG)) || [];
      commit("setTodoList", todoList);
      commit("setTagList", tagList);
    },
  },
});
store.js 里面主要是对 todoList 和 tagList 进行管理,包括初始化、新增、修改、删除等操作。还提供了一个 getter 用于对 todoList 做过滤操作。之后,需要在 app.ux 中引入 store.js,并挂到全局对象上
import store from "./store/store.js";
import Vuex from "quickapp-vuex";

Vuex.install(store);
这样,我们就可以在 ux 文件中使用this.$store操作 vuex 了。(更多关于在快应用中使用 vuex 的介绍可以查看《在快应用开发中使用 Vuex》和《在快应用开发中使用 vuex module》)
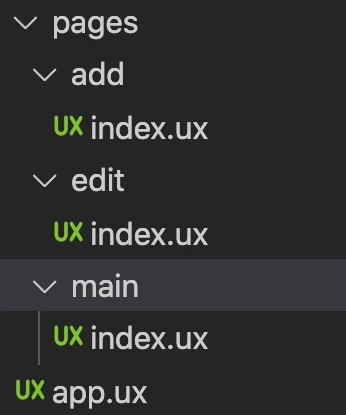
2.我们需要新建三个页面:main 页面用于展示 todo item,add 页面用于添加新的 item,edit 页面用于修改 item。所以,先在 src 目录下新建 pages 目录,用于存放页面文件,然后在 pages 页面下新建三个目录,代表三个页面,并在每个目录下都新建一个 index.ux 文件
然后,需要在 manifest.json 文件中配置这三个页面,并将 main 页面设为入口页面
{
  ...
  "router": {
    "entry": "pages/main",
    "pages": {
      "pages/main": {
        "component": "index"
      },
      "pages/add": {
        "component": "index"
      },
      "pages/edit": {
        "component": "index"
      }
    }
  },
  ...
}
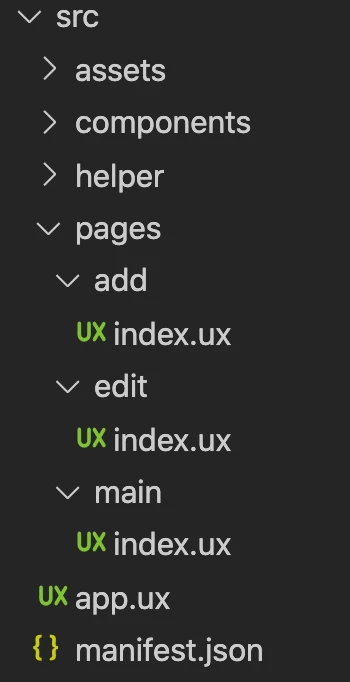
2.除了 pages 目录之外,还需要在 src 目录下新建其他几个目录:assets,用于存放图片、样式等静态资源文件;components,用于存放项目中用到的组件(当项目比较大,组件比较多时,推荐在这个 components 文件中存放项目公用的组件,在 pages 下的各个页面目录下再新建一个 components 目录,用来存放只在这个页面中使用到的组件);helpers,用于存放项目中用到的各种辅助工具
3.接下来,我们先在 helpers 里面添加三个文件,用于存放项目中使用到的辅助工具
constant.js,用于存放项目中用到的常量,此处只定义了一个 KEYS,用于存放操作 storage 时使用的 key 值:
export const KEYS = {
  STORAGE_KEY_QUICKAPP: "todolist-quickapp",
  STORAGE_KEY_TAG: "todolist-tag",
};
storage.js,定义了 set 和 get 两个方法,用于存放 storage 和获取 storage(注意,使用 storage 时,需要通过import storage from '@system.storage'引入快应用提供的 storage 接口)
import storage from "@system.storage";

export default {
  set: (key, value) => {
    const cvalue = typeof value === "object" ? JSON.stringify(value) : value;
    storage.set({
      key,
      value: cvalue,
      success: function (data) {
        console.log(`handle success: data = ${data}`);
      },
      fail: function (data, code) {
        console.log(`Somthing Error[@storage set]: data = ${data}`);
      },
    });
  },

  get: (key) => {
    return new Promise((resolve, reject) => {
      storage.get({
        key,
        success: (data = "{}") => {
          try {
            resolve(JSON.parse(data));
          } catch (error) {
            resolve(data);
            console.log(`Somthing Error[@storage get]: error = ${error}`);
          }
        },
        fail: function (data, code) {
          console.log(`Somthing Error[@storage get]: data = ${data}`);
          reject(data);
        },
        complete: () => {
          resolve();
        },
      });
    });
  },
};
utils.js,用于存放项目中使用到的一些工具方法
//格式化时间
export function formatTime(date) {
  const year = date.getFullYear();
  const month = date.getMonth() + 1;
  const day = date.getDate();
  const hour = date.getHours();
  const formatHour = hour < 10 ? "0" + hour : hour;
  const minute = date.getMinutes();
  const formatMinute = minute < 10 ? "0" + minute : minute;

  return year + "-" + month + "-" + day + " " + formatHour + ":" + formatMinute;
}

//过滤器,用于对todo列表做过滤操作
export const filters = {
  all: (list, target) => {
    return list;
  },
  active: (list, target) => {
    return list.filter(function (task) {
      return !task.completed;
    });
  },
  completed: (list, target) => {
    return list.filter(function (task) {
      return task.completed;
    });
  },
  repeated: (list, target) => {
    return list.filter((task) => task.title === target).length > 0
      ? true
      : false;
  },
  tag: (list, target) => {
    return list.filter(function (task) {
      return task.tag === target;
    });
  },
};

//获取id
export function getId() {
  const time = +new Date();
  const rand = Math.random().toString().slice(-5);
  return time + rand;
}
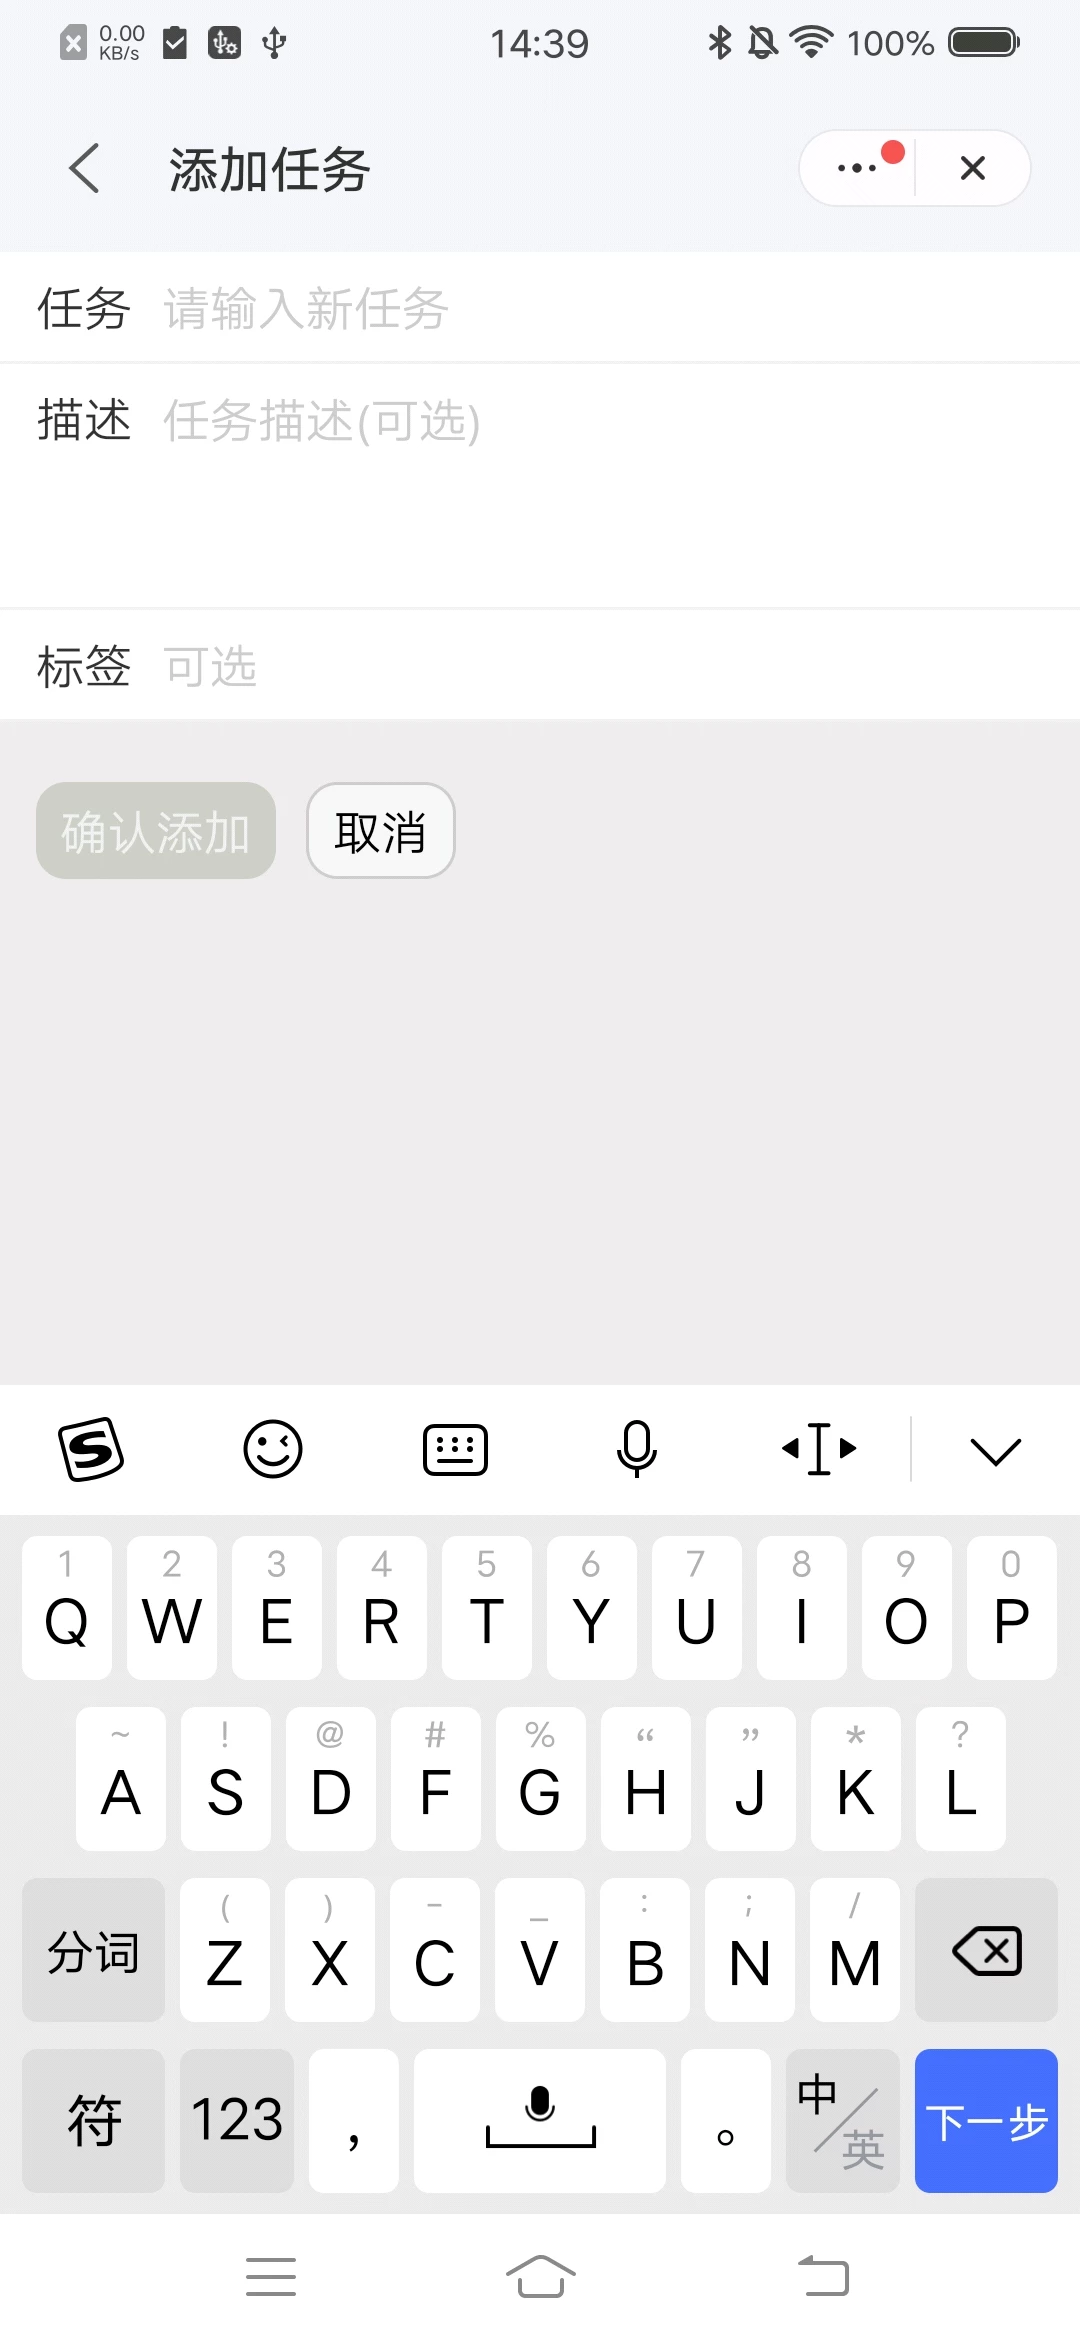
4.接下来,就正式开始开发了。我们先来开发比较简单的 add 页面,通过 main 页面上的添加按钮可以进入 add 页面,然后在 add 页面输入 todo item 相关的一些信息,再点击完成就可以新建一条 todo item
<template>
  <div class="page column">
    <div class="content">
      <text class="content-label">任务</text>
      <input
        id="add-task-input"
        class="content-input"
        type="text"
        placeholder="请输入新任务"
        @change="onChangeNewTitle"
      />
    </div>
    <div class="content">
      <text class="content-label" style="align-self:flex-start;">描述</text>
      <textarea
        class="content-textarea"
        placeholder="任务描述(可选)"
        @change="onChangeDesc"
      ></textarea>
    </div>
    <div class="content">
      <text class="content-label">标签</text>
      <input
        class="content-input"
        type="text"
        @change="onChangeTag"
        placeholder="可选"
      />
    </div>
    <div class="btn">
      <text class="add-btn" @click="onAddNewTask" disabled="{{disabled}}"
        >确认添加</text
      >
      <text class="cancel-btn" @click="onCancelAdd">取消</text>
    </div>
  </div>
</template>

<script>
  import router from "@system.router";
  import prompt from "@system.prompt";
  import { filters, formatTime, getId } from "../../helper/utils";
  import { mapState, Component } from "quickapp-vuex";

  export default Component({
    data: {
      title: "",
      desc: "",
      tag: "",
    },

    computed: {
      ...mapState(["todoList", "tagList"]),
      disabled() {
        return !this.title;
      },
    },

    onReady() {
      this.$element("add-task-input").focus({ focus: true });
    },

    onChangeDesc(e) {
      this.desc = e.value;
    },

    onChangeNewTitle(evt) {
      this.title = evt.value;
    },

    onChangeTag(evt) {
      this.tag = evt.value;
    },

    onAddNewTask() {
      const tempTitle = this.title.trim();
      if (filters.repeated(this.todoList, tempTitle)) {
        prompt.showToast({
          message: "请勿输入重复的任务",
        });
        return;
      }
      let tempTag = this.tag.trim();
      if (tempTag === "") {
        tempTag = "默认";
      }
      //保存新标签
      if (!filters.repeated(this.tagList, tempTag)) {
        this.$store.commit("addNewTag", tempTag);
      }
      const todo = {
        id: getId(),
        title: tempTitle,
        desc: this.desc.trim(),
        createTime: formatTime(new Date()),
        deadlineTime: "",
        completeTime: "",
        tag: tempTag,
        completed: false,
      };
      this.$store.commit("addNewTodo", todo);
      this.$element("add-task-input").focus({ focus: false });
      router.back();
    },

    onCancelAdd() {
      this.$element("add-task-input").focus({ focus: false });
      router.back();
    },
  });
</script>

<style lang="less">
  ...;
</style>
todo item 需要的信息比较简单,只需要提供 title、desc 和 tag 三个字段。其中 title 是必填的,desc 和 tag 是选填的,当 tag 未填时,会设置一个默认值。为了保证 title 必填,可以给完成按钮设置disabled属性,并通过 computed 计算是否要让这个属性生效。当 title 为空时,computed 返回 true,按钮无法点击;否则返回 false,按钮可以正常点击添加数据。同时,title 应该是唯一的,所以添加数据的时候还需要做一下去重的判断
保存数据时,除了上述几个用户输入的字段外,还需要增加其他的一些字段来记录 todo Item 相关的一些信息,包括 id、createTime、completed 等。
5.然后,再来开发同样比较简单的 edit 页面。点击首页里的 todo item,即可进入 edit 页面,可以对点击的 item 进行编辑。被点击的 item 的数据通过 router 接口的 params 属性传入,一般是将 item 数据用JSON.stringify转为字符串传入,再在 edit 页面的onInit回调里面使用JSON.parse重新解析成对象。

<template>
  <div class="page all column">
    <text class="title">任务详情</text>
    <div class="content">
      <text class="content-label">任务名</text>
      <input
        id="edit-task-input"
        class="content-input"
        type="text"
        value="{{item.title}}"
        @change="onEditTitle"
      />
    </div>
    <div class="content">
      <text class="content-label" style="align-self:flex-start;">描述</text>
      <textarea
        class="content-textarea"
        placeholder="添加备注"
        onchange="onEditDetail"
        >{{ item.desc }}</textarea
      >
    </div>
    <div class="content">
      <text class="content-label">任务状态</text>
      <text class="content-msg">{{
        item.completed ? '已完成' : '未完成'
      }}</text>
    </div>
    <div class="content">
      <text class="content-label">标签</text>
      <input
        class="content-input"
        type="text"
        value="{{item.tag}}"
        onchange="onEditTag"
      />
    </div>
    <div class="content">
      <text class="content-label">创建时间</text>
      <text class="content-msg">{{ item.createTime }}</text>
    </div>
    <div class="content" if="{{item.completed}}">
      <text class="content-label">完成时间</text>
      <text class="content-msg">{{ item.completeTime }}</text>
    </div>
    <div class="content">
      <text class="content-label">截止日期</text>
      <picker
        class="picker"
        type="date"
        start="{{new Date()}}"
        value="{{item.deadlineTime}}"
        onchange="getDate"
      ></picker>
    </div>
    <text class="add-btn" @click="onEditDone" disabled="{{!item.title}}"
      >确认</text
    >
  </div>
</template>

<script>
import router from '@system.router'
import prompt from '@system.prompt'
import { filters } from '../../helper/utils'
import { mapState, Component } from 'quickapp-vuex'

export default {
  public: {
    itemStr: ''
  },

  private: {
    item: {},
    oldTaskTitle: ''
  },

  computed: {
    ...mapState(['todoList', 'tagList'])
  },

  async onInit() {
    this.item = JSON.parse(this.itemStr)
    this.oldTaskTitle = this.item.title
  },

  onReady() {
    this.$element('edit-task-input').focus({ focus: true })
  },

  getDate(e) {
    this.item.deadlineTime = e.year + '-' + (e.month + 1) + '-' + e.day
  },

  onEditDetail(evt) {
    this.item.desc = evt.value.trim()
  },

  onEditTitle(evt) {
    this.item.title = evt.value.trim()
  },

  onEditTag(evt) {
    this.item.tag = evt.value.trim()
  },

  onEditDone() {
    if (
      this.item.title != this.oldTaskTitle &&
      filters.repeated(this.todoList, this.item.title)
    ) {
      prompt.showToast({
        message: '请勿输入重复的任务'
      })
      return
    }
    if (this.item.tag === '') {
      this.item.tag = '默认'
    }
    //保存新标签
    if (!filters.repeated(this.tagList, this.item.tag)) {
      this.$store.commit('addNewTag', tempTag)
    }
    this.$store.commit('updateTodo', this.item)
    this.$element('edit-task-input').focus({ focus: false })
    router.back()
  }
}
</script>

<style lang="less">
...
</style>
编辑页面除了可以修改 title、desc 和 tag 之外,还可以设置截止时间。设置时间需要使用快应用提供的 picker 组件,可以查看文档了解。
同样,保存数据时需要对 title 做去重判断和非空判断
6.最后来讲解一下 main 页面,main 页面使用到了两个组件,我们先来一一介绍一下这两个组件。
首先是 filterButton 组件,这个组件位于 main 页面底部,用于筛选不同状态的 todo item。包括三种状态:全部、已完成、未完成
<template>
  <div class="filter-btn-warp">
    <div class="filter-btn-content" onclick="changeStatus('all')">
      <image
        class="filter-icon"
        src="{{ curStatus === 'all' ? '../../assets/images/all-active.png' : '../../assets/images/all.png' }}"
      />
      <text class="filter-btn-text {{ curStatus === 'all' ? 'checked' : ''}}"
        >全部</text
      >
    </div>
    <div class="filter-btn-content" onclick="changeStatus('completed')">
      <image
        class="filter-icon"
        src="{{ curStatus === 'completed' ? '../../assets/images/complete-active.png' : '../../assets/images/complete.png' }}"
      />
      <text
        class="filter-btn-text {{ curStatus === 'completed' ? 'checked' : ''}}"
        >已完成</text
      >
    </div>
    <div class="filter-btn-content" onclick="changeStatus('active')">
      <image
        class="filter-icon"
        src="{{ curStatus === 'active' ? '../../assets/images/uncomplete-active.png' : '../../assets/images/uncomplete.png' }}"
      />
      <text class="filter-btn-text {{ curStatus === 'active' ? 'checked' : ''}}"
        >未完成</text
      >
    </div>
  </div>
</template>

<script>
export default {
  props: ['filterStatus'],
  data() {
    return {
      curStatus: this.filterStatus
    }
  },

  onInit() {
    this.$watch('filterStatus', 'handleWatchProps')
  },

  handleWatchProps(value) {
    this.curStatus = value
  },

  changeStatus(status) {
    this.curStatus = status
    this.$emit('changeFilterStatus', {
      filterStatus: this.curStatus
    })
  }
}
</script>

<style lang="less">
...
</style>
每当点击筛选按钮后,就会使用$emit给父组件发送一条消息,父组件接受到消息后,再执行相应的过滤操作。(对于子组件给父组件发消息,个人比较推荐使用$emit,因为这样在父组件中比较容易分辨消息来自哪个子组件)
接下来是 todoItem 组件,这个组件用于展示一项 todo Item,同时可以对这个 todo item 做一些操作,包括切换状态和删除操作。
<template>
  <stack>
    <div class="del-wrap" onclick="onDelTodo">
      <image src="../assets/images/delete.png" class="del-btn" />
    </div>
    <div
      class="content border-bottom"
      style="right: {{right}}px;"
      onclick="onShowEditTodo"
      ontouchstart="touchstart"
      ontouchmove="touchmove"
      ontouchend="touchend"
    >
      <image
        class="todo-icon"
        src="{{item.completed?'../../assets/images/click.svg':'../../assets/images/unclick.svg'}}"
        @click="onChangeTodoStatus"
      />
      <text class="todo-title">{{ item.title }}</text>
    </div>
  </stack>
</template>

<script>
import router from '@system.router'
import prompt from '@system.prompt'
import { Component } from 'quickapp-vuex'

export default Component({
  props: ['todoItem'],

  data() {
    return {
      item: this.todoItem,
      startPos: '',
      right: 0,
      canMove: true
    }
  },

  onInit() {
    this.$watch('todoItem', 'handleWatchProps')
  },

  handleWatchProps(value) {
    this.item = value
  },

  touchstart(e) {
    console.log('start', e)
    if (this.right !== 0) {
      this.right = 0
      this.canMove = false
    } else {
      this.startPos = e.touches[0].clientX
      this.canMove = true
    }
  },

  touchmove(e) {
    console.log('move', e)
    if (this.startPos > e.touches[0].clientX && this.canMove) {
      //左滑
      const right = this.startPos - e.touches[0].clientX
      this.right = right
    }
  },

  touchend(e) {
    console.log('end', e)
    if (this.right >= 40) {
      this.right = 60
    } else {
      this.right = 0
    }
  },

  onDelTodo() {
    prompt.showDialog({
      title: '',
      message: '确认删除?',
      buttons: [
        {
          text: '确认',
          color: '#000'
        },
        {
          text: '考虑一下',
          color: '#000'
        }
      ],
      success: data => {
        console.log('handling commit', data)
        if (data.index === 0) {
          this.$store.commit('delTodo', this.item)
          this.right = 0
        } else {
          return
        }
      }
    })
  },

  onChangeTodoStatus(e) {
    e.stopPropagation()
    if (!this.item.completed) {
      prompt.showToast({
        message: '任务完成'
      })
    }
    this.item.completed = !this.item.completed
    this.$store.commit('updateTodo', this.item)
  },

  onShowEditTodo() {
    router.push({
      uri: 'pages/edit',
      params: { itemStr: JSON.stringify(this.todoItem) }
    })
  }
})
</script>

<style lang="less">
...
</style>
切换操作比较简单,只是点击以后改变一下 todo item 的状态。删除操作通过使用stack组件,将 todo item 设置为两层,上一层展示 todo item 的 title 以及用于切换状态的选择框,下一层则是执行删除操作的按钮。组件通过监听 touchstart、touchmove、touchend三个触摸事件,计算出 right 的值,然后将这个值绑定到上一层的 style 属性上。这样,就可以通过左滑操作,漏出下面的删除按钮。
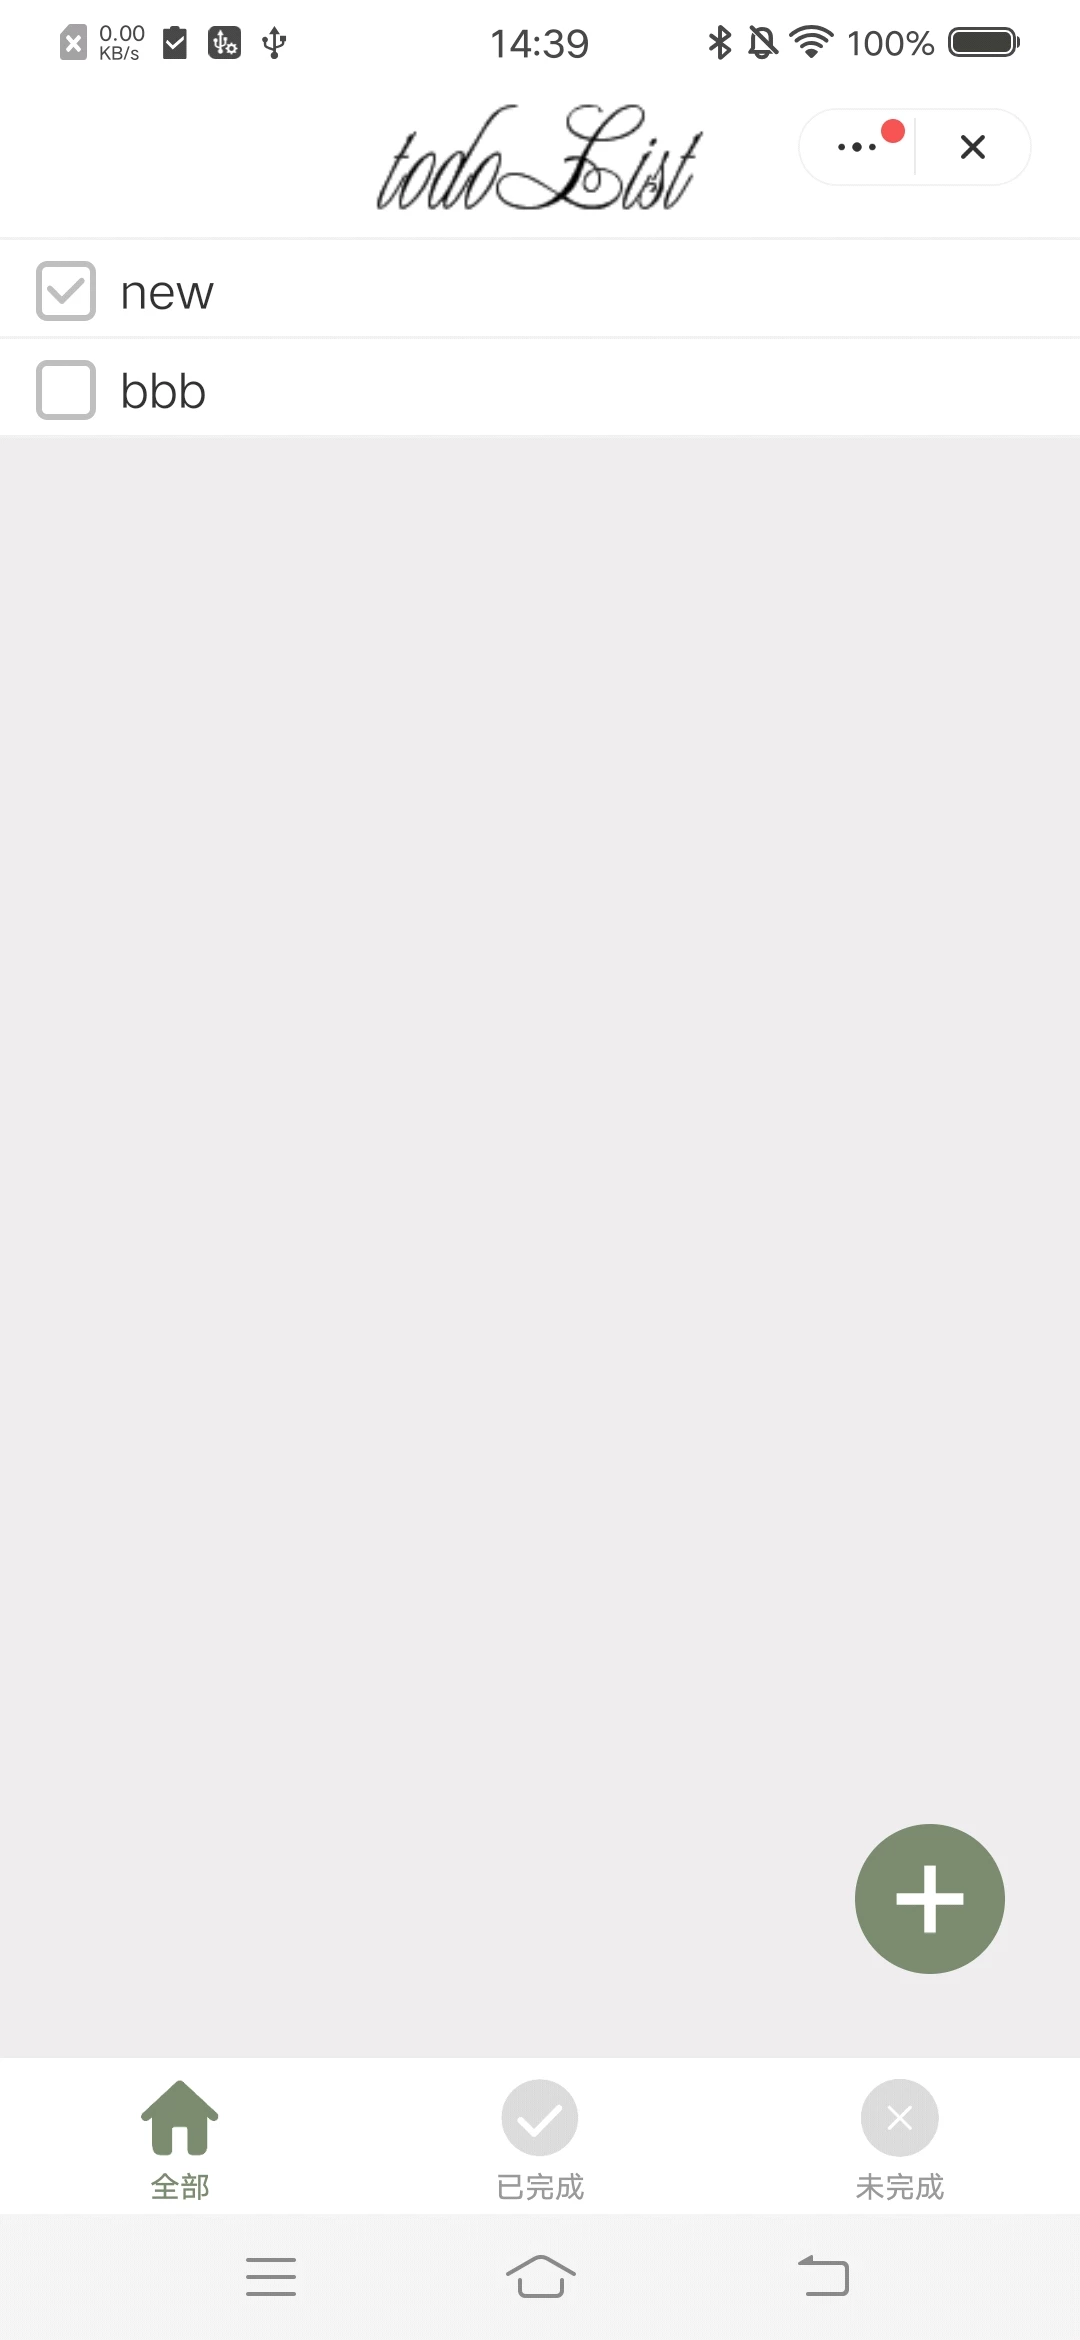
最后,介绍一下 main 页面
<import name="todoItem" src="../../components/todoItem.ux"></import>
<import name="filterButton" src="../../components/filterButton.ux"></import>

<template>
  <div class="all column page">
    <div class="header border-bottom">
      <image class="header-title" src="../../assets/images/header.png" />
    </div>
    <div class="all no-result" if="filteredTaskArr.length < 1">
      <image src="/assets/images/no-result.png"></image>
      <text>暂时还没有任务</text>
      <text>快去添加一条吧</text>
    </div>
    <block for="filteredTaskArr">
      <todoItem todo-item="{{$item}}"></todoItem>
    </block>
    <filterButton
      filter-status="{{filterStatus}}"
      onchange-filter-status="handleChangeFilterStatus"
    ></filterButton>
    <div class="add-btn" @click="turnToAdd">
      <image src="/assets/images/add.png"></image>
    </div>
  </div>
</template>

<script>
import router from '@system.router'
import prompt from '@system.prompt'
import storage from '../../helper/storage.js'
import { KEYS } from '../../helper/constant.js'
import { mapState, Component } from 'quickapp-vuex'

export default Component({
  data: {
    filterStatus: 'all'
  },

  computed: {
    ...mapState(['todoList', 'tagList']),
    filteredTaskArr() {
      return this.$store.getters.filteredList(this.filterStatus)
    }
  },

  onInit() {
    this.$watch('todoList', 'watchtodoList')
    this.$watch('tagList', 'watchtagList')
    this.$store.dispatch('init')
  },

  watchtodoList(newV, oldV) {
    console.log('todoList change happen')
    storage.set(KEYS.STORAGE_KEY_QUICKAPP, newV)
  },

  watchtagList(newV, oldV) {
    console.log('tagList change happen')
    storage.set(KEYS.STORAGE_KEY_TAG, newV)
  },

  handleChangeFilterStatus(evt) {
    this.filterStatus = evt.detail.filterStatus
    console.log('ChangeFilterStatus', this.filterStatus)
  },

  turnToAdd() {
    router.push({
      uri: 'pages/add'
    })
  }
})
</script>

<style lang="less">
...
</style>
main 页面在 onInit 方法中通过this.$store.dispatch('init'),通知 vuex 更新 todoList 和 tagList。然后使用 computed 获取到 vuex 中保存的 todoList 和 tagList,并对这两个 list 设置了 watch,每当 list 更新时,持久化 list。在 computed 中还使用 vuex 的 getter 通过不同 filterStatus 获取不同的过滤结果,再将过滤结果使用 todoItem 组件展示出来。通过点击底部的 filterButton 组件,可以切换不同的 filterStatus 从而使用不同的 filterStatus 获得不同状态下的 todoList。这里有一个坑需要注意一下,展示时使用的 list 和 getStorage 获取到的不是一个 list,所以不能直接使用 for 指令中的$idx 直接去操作 getStorage 获取到的数组。这边我使用的是查找 id 的方式找到所操作 todo item 的真实 index,然后进行操作。当然,你也可以将两个 list 的 index 做一下映射,也是可以的。